
Understanding the TLS Handshake: The Secret Behind Your Secure Connection 🔒
In this article, we’ll delve into the intricate process that occurs between your device and a website when you see that reassuring padlock icon in your browser. This guide aims to shed light on every step that constitutes the TLS handshake, essential for establishing a secure online connection.
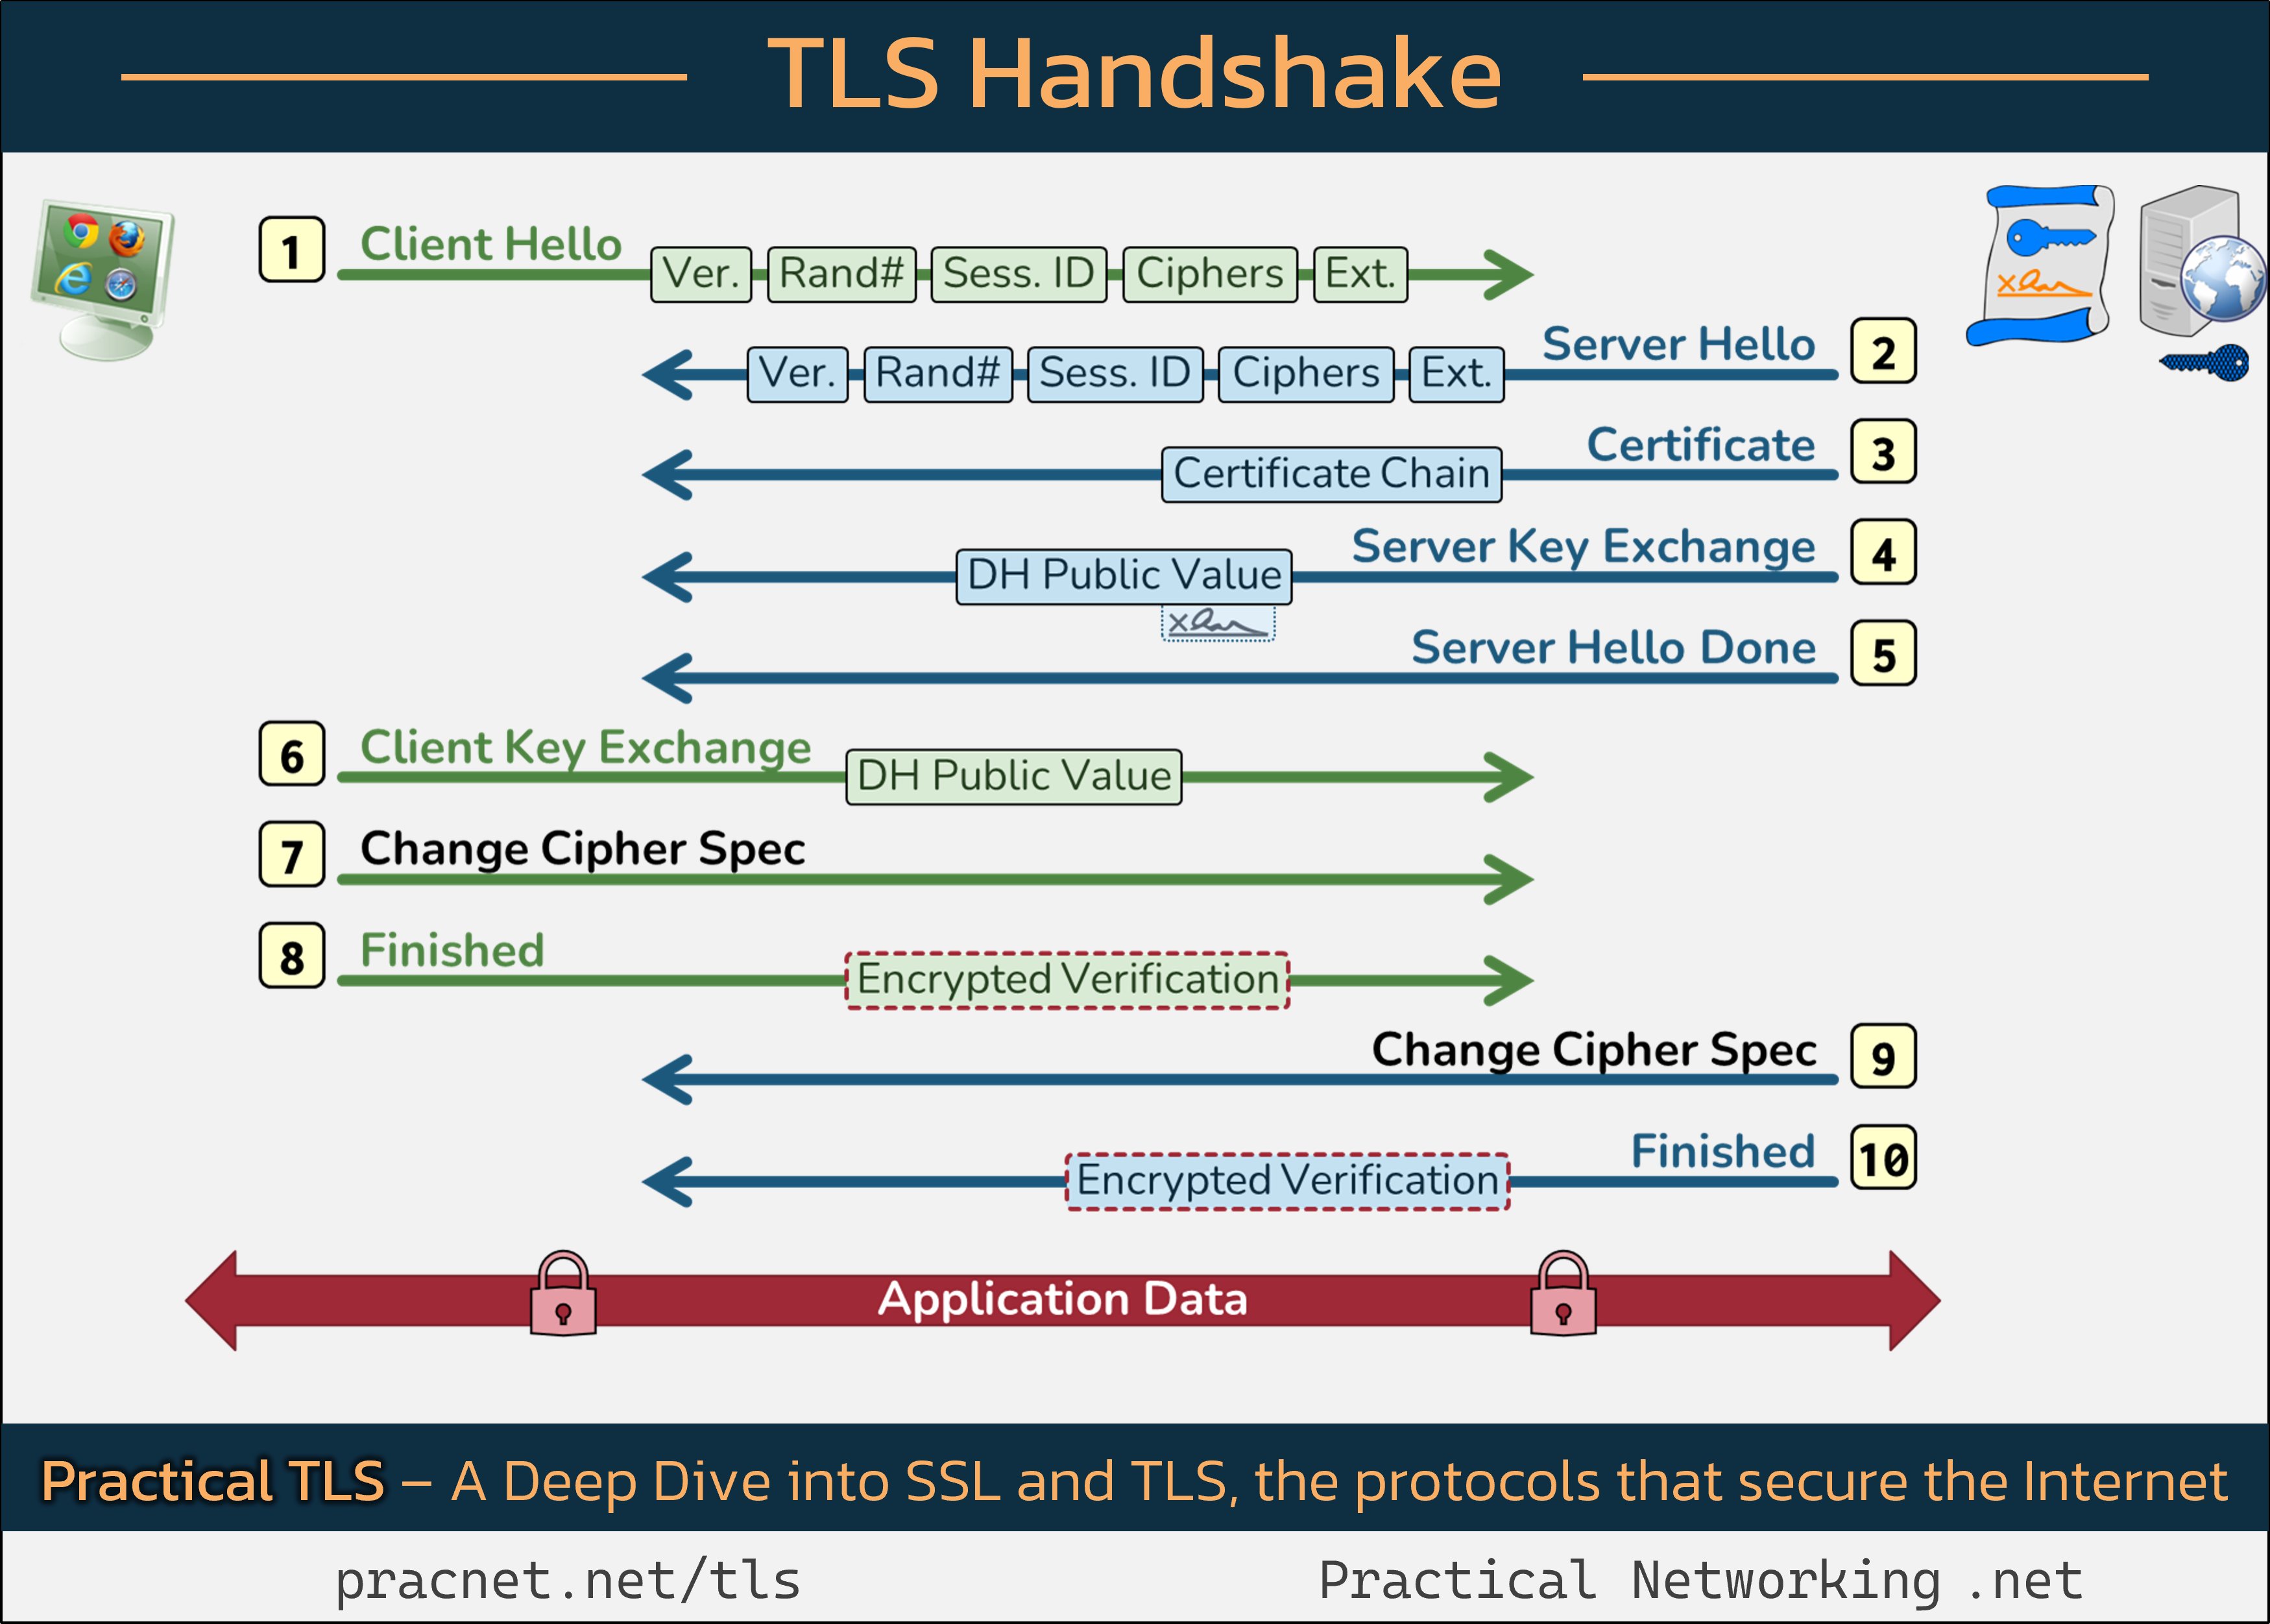
For a visual reference, consider keeping this infographic open in a separate tab as we explore:
(Image Source: Twitter)
Introduction
To understand the TLS handshake, it’s important to recognize that the primary objectives of SSL/TLS technology are twofold:
- ✅ Validate the Server’s Identity: Ensure that the server you are connecting to is genuinely who it claims to be.
- ✅ Establish Secure Session Keys: Create keys to encrypt the data that will be exchanged to keep your information confidential.
Before we proceed to the handshake’s steps, let’s clarify two fundamental concepts:
Records vs. Packets
In the handshake illustration, each line represents a “record” sent during the TLS handshake, which is distinct from a “packet.” It’s worth noting that multiple records can fit within a single packet or require several packets to carry just one record.
Cryptographic Foundations
Acquainting yourself with the following cryptographic notions will provide additional context for our discussion:
We’ll keep our focus on the handshake itself rather than dive into cryptographic principles. However, if these concepts are new to you, I recommend checking out the linked resources.
Step 1: Client Hello
The TLS handshake begins with a message sent by the client, which is typically your web browser, known as Client Hello. This message contains five key fields:
- SSL Version
- Random Number
- Session ID
- Cipher Suites
- Extensions
Each of these fields plays a crucial role in the handshake’s successful execution.
1.1 SSL Version
The client informs the server
Share this content: