Title: How to Handle a Broken Laptop CPU Heatsink Screw: A Comprehensive Guide
When maintaining a laptop, one of the key tasks that enthusiasts frequently encounter is replacing thermal paste on the CPU. However, this process can sometimes lead to unexpected challenges, such as breaking a heatsink screw. If you find yourself in this predicament, don’t fret! Here’s a professional guide on how to tackle this issue effectively.
Understanding the Problem
Recently, while attempting to replace the old heatsink paste on a laptop’s CPU, I encountered a common problem: one of the screws secured to the heatsink snapped during the uninstallation process. This can occur when too much force is applied, especially if the screw has become corroded or seized over time.
Assessing Your Options
Once you realize that a screw has broken, your first step is to assess how to remove the remainder of the screw while minimizing damage to the laptop’s surrounding components. Here’s a structured approach to address this issue:
-
Disassemble Carefully: Begin by dismantling the laptop carefully to access the heatsink. Take your time to ensure that you’re not causing additional damage to other components. Keep track of screws and parts so you can reassemble everything correctly afterward.
-
Examine the Broken Screw: Once you have access to the heatsink, examine the broken screw. Depending on your situation, you may need to drill out the screw or use a screw extractor.
-
Drilling Out the Screw: If you opt to drill it out, select a drill bit that is slightly smaller than the screw diameter. Make sure to drill slowly and evenly to avoid damaging the heatsink or motherboard.
-
Finding a Replacement Screw: After successfully removing the broken screw, you will need to find an appropriate replacement. Look for a screw of similar size or slightly larger, ensuring that it fits securely without overcrowding the area or affecting nearby components.
-
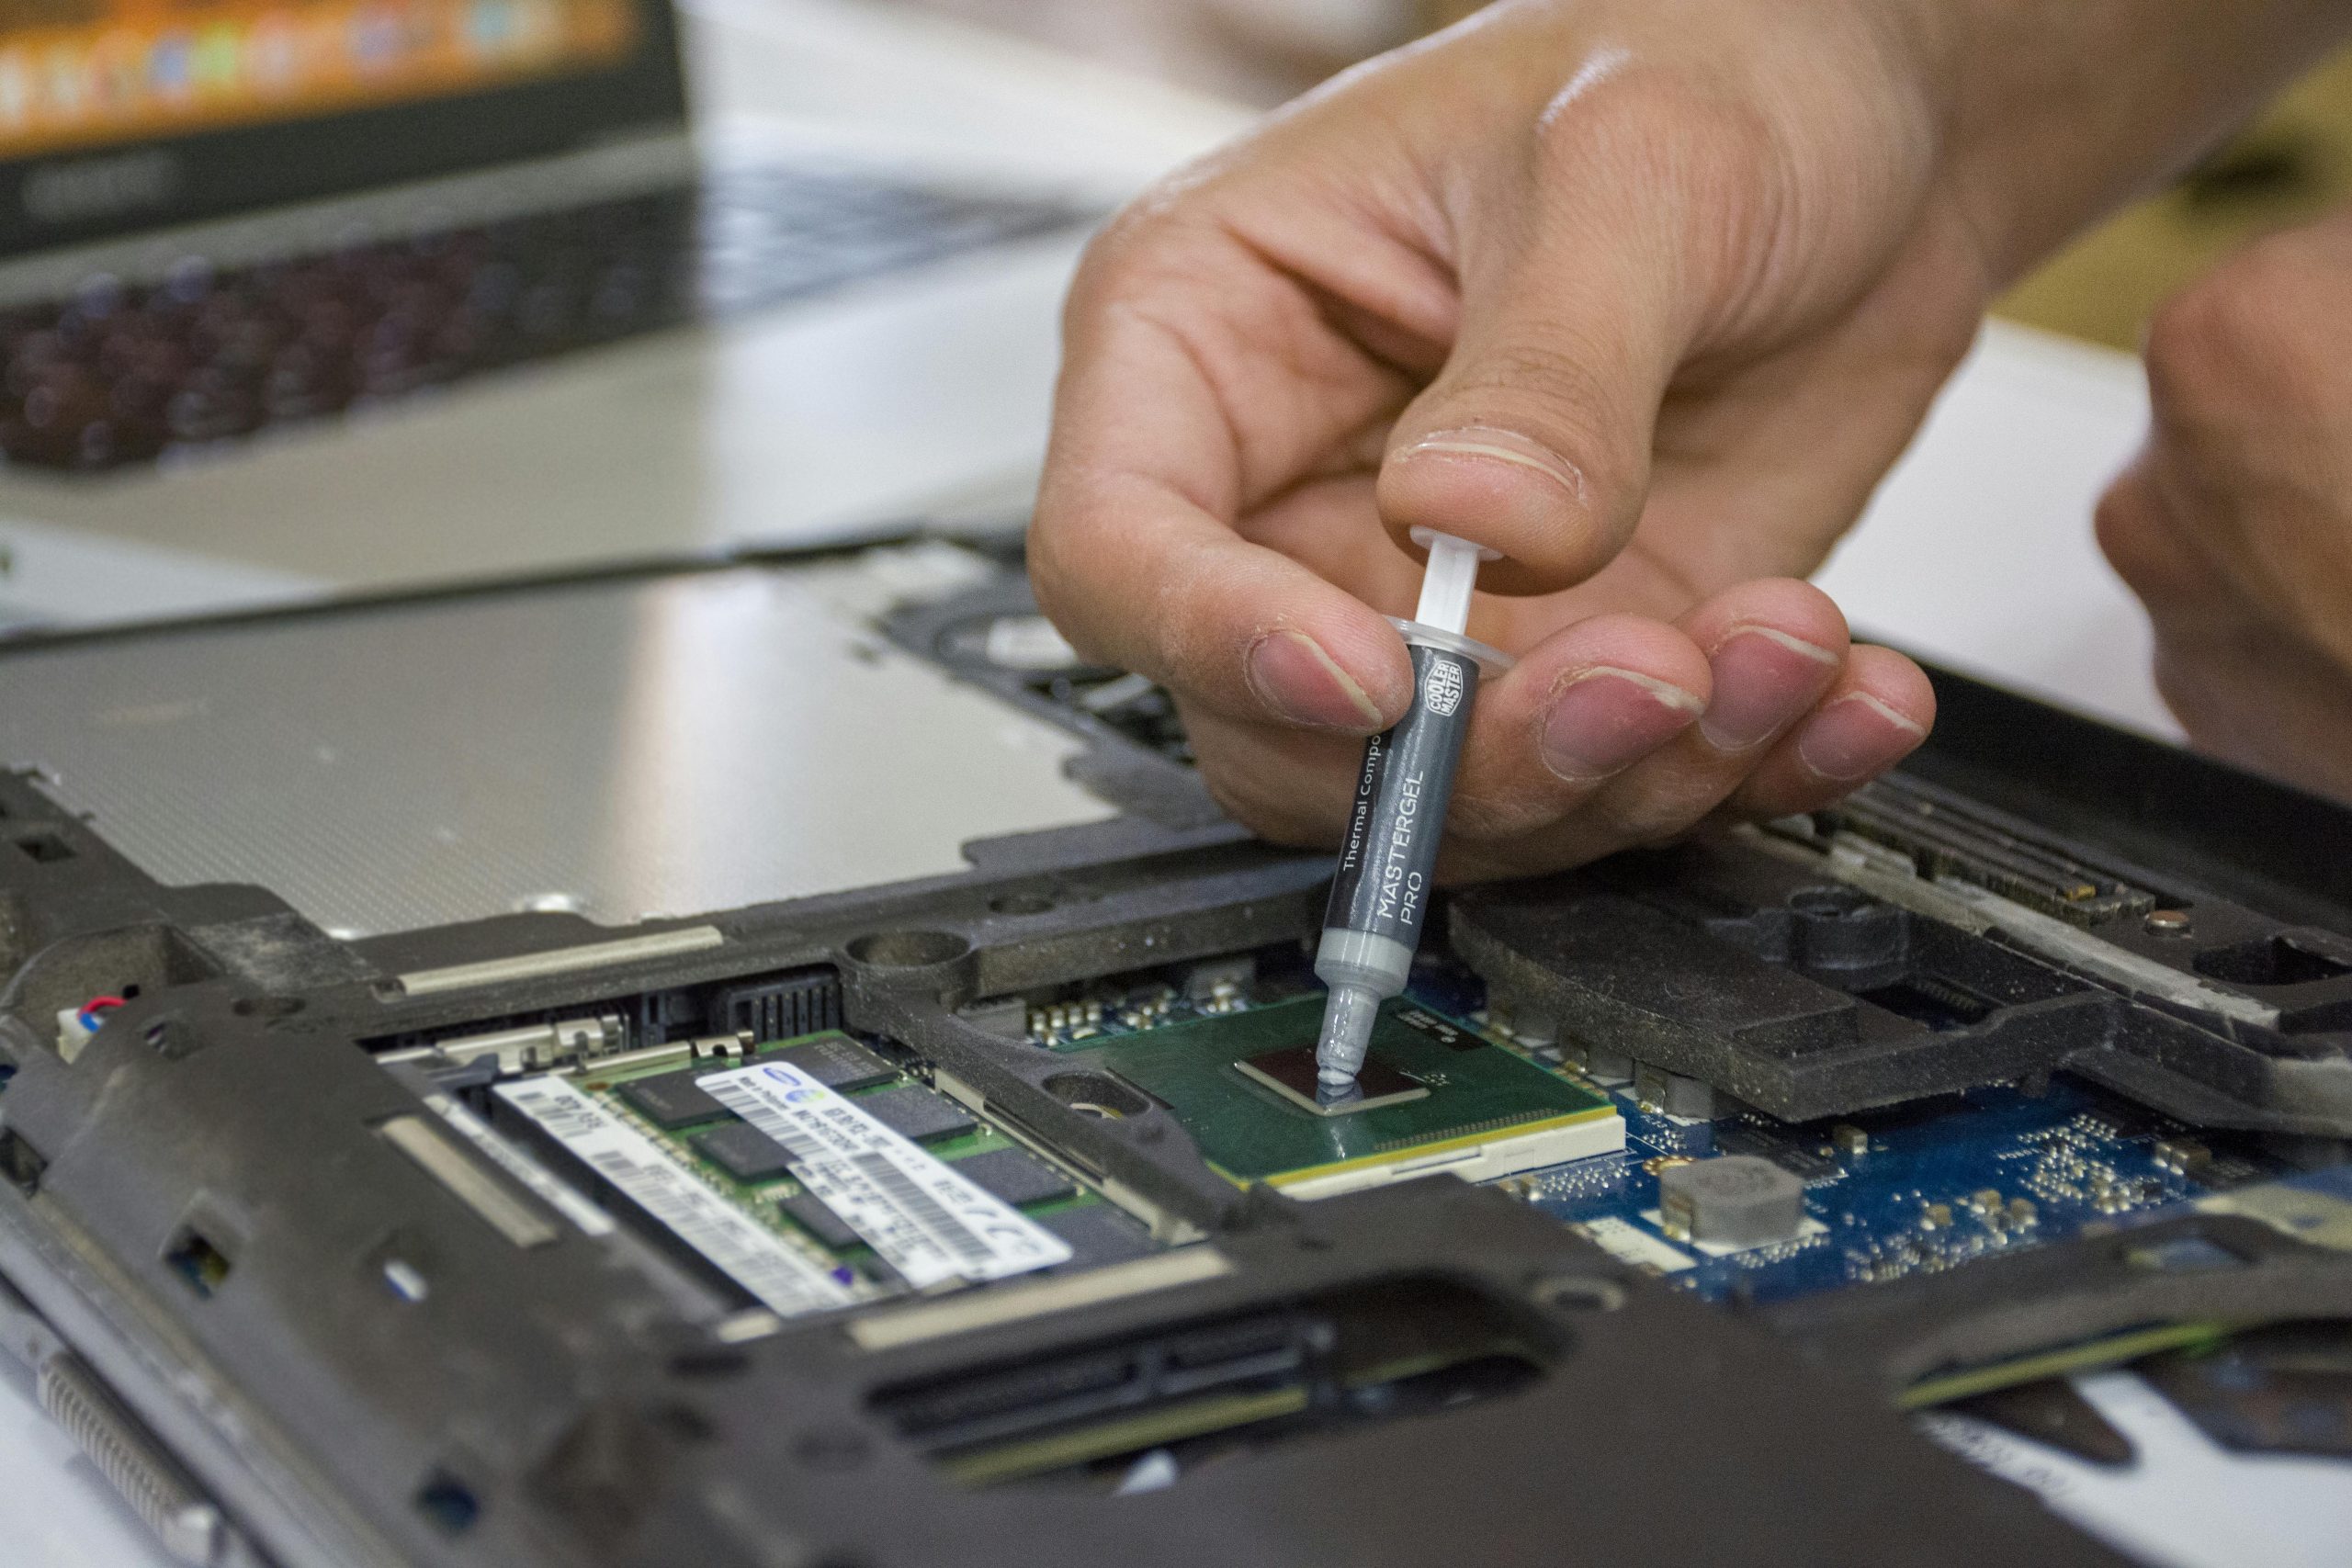
Apply New Thermal Paste: Once the screw issue is resolved, proceed to apply fresh thermal paste to the CPU before reattaching the heatsink. This step is crucial for ensuring optimal cooling performance.
-
Reassembly and Testing: Finally, reassemble the laptop with all parts and screws in their correct positions. Once everything is back together, power on the laptop to ensure it operates smoothly without any thermal issues.
Conclusion
Encountering a broken screws during a laptop repair can be frustrating, but
Share this content:


Hi there,
It can be challenging when a heatsink screw breaks during maintenance. To address this issue effectively, I recommend following these steps:
If you’re uncomfortable performing these steps yourself, consider seeking professional repair services to avoid accidental damage